Sunday, January 30, 2011

Turkey Burger and Vegetable Medley

After a late lunch at Wild Mountain, feeling stuffed to the gills, dinner just didn't sound appetizing. I was sluggish, surprisingly unwilling to take out any ingredients from the fridge and cabinets, Dave and I took a walk to Boulder's Pearl Street. We stopped at the sushi restaurant, didn't feel like sushi, walked up and down the mall trying to figure out what would. After a full lap we decided to turn home.

We had plenty of things to eat at home, so lets just eat them!

We decided to have a simple and small turkey burger that looks like it is in a pocket of melted Muenster cheese and mix of the vegetables left over in my fridge. I have been pretty true to my solstice projection to be more healthy and these little vegetable medleys have been a perfect mix making.. Adding excitement to the potentially mundane diet.

The Burger

Shopping List:
1/2 pound of ground turkey
1/2 teaspoon of grated pepper
1/2 teaspoon of garlic powder
1/4 teaspoon of salt
4 tablespoons of plain breadcrumbs
1 tablespoon of parsley

Putting it Together:
  1. Combine all the ingredients with a fork
  2. If the meat feels like it won't stick together add a little more breadcrumbs
  3. Make patties with you hands, do not pound them together
  4. Add to a skillet with a very thin layer of oil and heated to a medium heat.
  5. I honestly can't tell you how long it took to cook these, I'd predict about 2.5 minutes on each side.
  6. If you want cheese, after they are cooked, turn off the heat, put the cheese on top and cover the pan so it can melt without further cooking and drying out the burger.
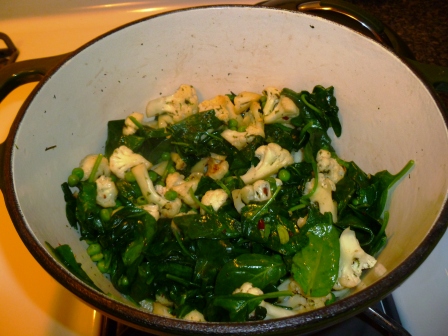
The Medley

Shopping List:
A small stalk of broccoli
1 zucchini
1 cup of frozen corn
4 dashes of cayenne pepper
2 dashes of garlic powder
1 teaspoon of parsley
1/2 teaspoon of fresh cracked pepper
salt to taste.

Putting it Together:
  1. Chop the vegetables, I like chopping the zucchini in different shapes just because, no method to the madness, but always doing the same thing is boring to me.
  2. Add all the ingredients except for the frozen corn to a greased medium hot skillet.
  3. Stir it around for 5 minutes until the broccoli and zucchini turn a nice bright green color and become fragrant.
  4. Add the corn and cook for another 3 minutes.

Saturday, January 29, 2011

Quick Vegetable & Rice Casserole

After a long day of painting, a weekend without enough vegetables it was time for a recharge! I was tired and did not want to spend a lot of time in the kitchen after painting it all day. I took some of the things in the fridge, pantry, and freezer to make a delicious quick casserole that satisfied the vegetable craving in an instant!

I had no idea what was going to happen, I didn't have a recipe, I just had a few flavor combinations I wanted to mix. A true Keenie Kitchen experiment gone right!

We had a lightly seasoned pork tenderloin to accompany the flavorful casserole for a light, scrumptious meal.

Shopping List/ Pantry List:
  • 2 cups of chopped cauliflower
  • 3/4 cup of uncooked brown rice
  • heaping 1/2 cup of Parmesan cheese
  • 1 cup of frozen peas
  • 2-3 dashes of garlic powder
  • 2-3 dashes of crushed red pepper
  • 3 big dashes of parsley
  • 1/4 tsp of cracked pepper
  • 1/4 tsp of salt, salt to taste

Putting it Together:
  1. Start the brown rice in a rice cooker or stove top to the directions of whatever rice you are using.
  2. Heat a pot with a thin layer of oil to a medium/hot heat, once heated, add cauliflower, garlic powder, crushed red pepper, parsley, pepper, and salt.
  3. As the cauliflower just starts to soften and get a light brown color (4 to 6 minutes) add the peas. Stir the peas constantly as they finish thawing in the pan. (about 1 minute)
  4. Once the peas are bright green add the spinach to fill the pot full. As the spinach starts to cook down you can add just a little more. Spinach cooks down so much you won't overload it!
  5. Once the spinach is cooked down but not totally shriveled add the brown rice and Parmesan.
  6. Taste, does it need a little salt? add some salt if you do.
  7. Turn off the heat, leave the cover on for a few minutes, serve!


Notes:
- The pork was cooked with a light rub: I salted, peppered, and garlic powdered each side and let it absorb the flavors before cooking. I cooked it at 375 for approximately 30 minutes until the juices ran clear.
- You can add literally any yummy vegetables to this casserole, the spice, cheese and rice are the staple to this dish. Try broccoli, corn, diced zucchini.. yum!
- I used freshly grated Parmesan, since we aren't baking you can add more or less of the ingredient depending on your taste buds, and how healthy you want to be!
-Questions?


Tuesday, January 25, 2011

Italian Meatballs for the Over Worked.. and a Quick Tomato Sauce

In a super busy work of work, commuting, and trying to get a little exercise sometimes makes it nearly impossible to get the time to make homemade food.


Scott was inspired to make Italian meatballs and treated me with the delicious results! After a quick run, after work, he came over with a tupperware full of scrumptious meatballs.


With the foundation for a wonderful meal I threw in some pasta and roasted broccoli.. from my roasted broccoli recipe in my Thanksgiving Feast with Friends entry.


The meatballs were flavor packed and had an awesome rosemary highlights.. they needed a mild sauce.


Shopping List:
  • Half an onion
  • 2 cloves of garlic
  • 1 28 oz. can of diced tomatoes.
  • 3 oz. of tomato paste
  • 1-2 teaspoons of cayenne pepper (depending on your love or hate of spice)
  • 1/2 a teaspoon of salt
  • Fresh cracked pepper
Putting it Together:
  1. Coarsely chop the onion
  2. Add the onion to a heated skillet (medium/hot)
  3. Cook until turning translucent, then toss in the garlic (pressed), stir constantly until it becomes aromatic.
  4. Add the remaining ingredients
  5. Let simmer anywhere from 10-30 minutes depending on how developed you want the flavor and how much time you have!
  6. Top your food and chow down! Heck, you deserved it!

Sunday, January 23, 2011

Eggplant Parmesean Undressed


We had chili and vegetables.. I didn't want to make a more loaded chili so i new another side dish was in order. All the vegetables were starting to get a little old and the eggplant seemed like it was in the most need of getting used. I did consider adding it to the chili, but only for a millisecond. What should I do? Make an eggplant stuffed with chili?

No.. I got some sort of odd inspiration to have fried eggplant. More vegetables and a good way to eat them is with a little bit of grease. (perfect!!) Dave pointed out that the eggplant had a decent amount of carbs. While I am trying to have a lower carb diet I substituted the eggplant for a side of rice, pasta or bread.

I had a little inspiration from the way we fried our potato latkes, which turned out to be a lot like the workings of eggplant parm. What I ended up with was a tasty tender eggplant that was spiced up with chili and a delicious hardy meal. You can take this eggplant undressed and make it into anything you want.. and some day I'll add a full Eggplant Parm recipe.

Shopping List:
  • 1 Eggplant
  • 1 egg
  • 2 tablespoons of heavy cream, milk, or if you don't have it 1 tablespoon of water
  • 3/4 cup of breadcrumbs
  • 6 dashes of cayenne pepper (up to 9 if you want a bigger kick)
  • 6 dashes of parsley
  • 4 dashes of garlic powder
  • 1 teaspoon of salt
  • 6 turns of black pepper
  • either peanut or vegetable oil.


Putting it Together:
  1. Peel and slice the eggplant lengthwise and soak in a salt water bath for at least 30 minutes
  2. Blot the eggplant dry
  3. Whip the egg and milk or water together- the heavy cream worked great to add a little richness to the flavor combination.
  4. Combine the breadcrumbs and all remaining ingredients except the oil.
  5. Dredge the eggplant with the egg and breadcrumbs
  6. Add the oil to a large flat frying pan so it is covered with a thin distinguishable layer of oil. (see picture below)
  7. Heat the oil and only add the eggplant once the oil is hot.
  8. Fry the eggplant on each side for 3-4 minutes until it is golden brown.  
  9. Let the eggplant rest on a paper towle to drain any excess oil.
  10. EAT! (and savor!)


 Notes:
- There are so many ways to use eggplant, this is one of my favorites because of how tender it makes the eggplant
- The eggplant bath is an important step, it takes out the bitter flavor in the eggplant. I like this method better than just letting it sweat. I can see how much the eggplant has "sweat" by the color of the water. I look for it to change from light green to a slightly murkier color before I remove it.
- Blotting the eggplant before dredging and frying is important, if you don't it will be a "mushy" breading and end product.

Thursday, January 20, 2011

Chicken Adobo

I dislike it when I hear people say that they cannot cook. Cooking can be easy and fun. If you don't have the knack for the "this and that" method of cooking, I hope that my blog has helped you gain confidence and do the whole sample on the spoon with a long contemplative thought about what you'd like to taste, ritual. If you claim you cannot cook however, I dare you to find amazing recipes to try and follow them exactly (ALWAYS TASTING ALONG THE WAY!!).. Then tell me you can't cook.

I challenged Dave to do this. I was gravely ill with a nasty head cold, unable to barely cook myself a fricasse like normal. Dave took a new approach to cooking a stewed chicken with a great New York Times recipe:

http://www.nytimes.com/2011/01/09/magazine/09Food-t-001.html

with a side of brown rice and steamed brocolli, this was an amazing meal.. especially for the patient with a head cold:


Shopping List:
  • 1 cup coconut milk
  • ¼ cup soy sauce
  • 1½ cup rice vinegar
  • 12 garlic cloves, peeled
  • 3 whole bird’s-eye chilies or other fiery chili
  • 3 bay leaves
  • 1½ teaspoons freshly ground black pepper
  • 3 to 4 pounds chicken thighs.

Putting it Together:

1. Combine all of the marinade ingredients in a large, nonreactive bowl or resealable plastic freezer bag. Add the chicken and turn to coat. Refrigerate overnight or for at least 2 hours.
2. Place chicken and marinade in a large lidded pot or Dutch oven over high heat and bring to a boil. Immediately reduce heat to a simmer and cook, stirring occasionally, until the chicken is cooked through and tender, around 30 minutes.
3. Heat broiler. Transfer chicken pieces to a large bowl, raise heat under the pot to medium-high, and reduce the sauce until it achieves almost the consistency of cream, about 10 minutes. Remove bay leaves and chilies.
4. Place chicken pieces on a roasting pan and place under broiler for 5 to 7 minutes, until they begin to caramelize. Remove, turn chicken, baste with sauce and repeat, 3 to 5 minutes more. Return chicken to sauce and cook for a few minutes more, then place on a platter and drizzle heavily with sauce.


Notes:
- I wouldn't put it under the broiler as long next time, we did what the recipe recommended but it ended up drying out the top layer. In step #4 I would baste it as I put it in the broiler and only leave it in there for 3-4 mintues, 5 minutes MAX!!

Tuesday, January 18, 2011

A Night of Vegetables

There are so many rumors out there about what you should eat and what you shouldn't. Cooking wonderful food for my blog, OVER indulging by eating 2 servings, a big bowl of ice cream for dessert,  and M&Ms all day at work, really made me have to go into diet mode after the holidays. Moderation, Un-processed foods, healthy snacks, CONSISTENT exercise.. it was a new beginning, again.

In the spirit of talking about health and diet my friend told the tale of our body's pH. It turns out our bodies should be more LESS acidic, and the more basic pH foods we eat, the healthier we will be. This is a complicated way of saying EAT VEGETABLES! In the spirit of this obvious revelation, or healthy life style, we decided to cook vegetables in a bunch of ways to consume a plate that was 5% meat, 5% noodle, and 90% Vegg.

The irony of our meal: Deep Fried Veggies! (and non deep fried).. but still..

Shopping List:

1 liter of peanut oil
2 eggs
plain bread crumbs
Parmesan cheese (preferably freshly grated)
2 cloves of garlic
tablespoon of whipped butter
1-2 eggplants
1-2 sweet potatoes
Package of asparagus
S&P

Putting it together... Eggplant:

  1. Peel eggplant and cut into french fries shape
  2. Mix two eggs in a separate bowl.
  3. Combine 3/4  cup of plain bread crumbs, 5-6 tblspns of Parmesan, fresh cracked pepper to preference, 2 teaspoons of salt.
  4. Dredge the eggplant sticks in eggs and then cover with bread crumb mixture.
  5. Deep fry at 375 for 4-5 minutes, until golden brown.
  6. Empty the fries on to a paper towel for a mute so the excess oil can drain.
  7. Serve.
Putting it together... Sweet Potato:
  1. Peel sweet potatoes and cut them into fry shapes.
  2. Add to deep frier, 350, for about 5-7 minutes, until golden with a little brown on the edges.
  3. Empty the fries on to a paper towel for a minute so the excess oil can drain.
  4. Serve.
Putting it together... Spinach:


This was a New York Times recipe found by Dave. It was awesome! We will have modifications to tell tales of in the future as I wasn't so happy with the amount of sauce (NEED MORE) and texture (THE GOOD OLD TOFU BAKE IS IN STORE!):

Putting it together... Asparagus:
  1. Trim the hard ends off the asparagus
  2. Add to a pan of salted water and steam for 5-6 minutes, until fork tender.
  3. Strain the asparagus and set aside
  4. Add 1-2 minced cloves of garlic to a pan on medium heat with melted whipped butter. Saute until fragrant (about 1 minute)
  5. Mix asparagus with garlic butter and top with Parmesan and cracked pepper.
No night of health and renewal  is complete without a poem and smudge for the spirit, the soul, and the mind:

Elevate the life of all friends
It isn't easiest to make life easy
Remember why you do it
Acidity, Toxicity, Eat Vegetables
Salvation for my soul .. with that..
We have new habits, its our goal
Lights, Energy, Peace,
Its like wearing a fleece
Acidity, Toxicity, Eat Vegetables
 Leg go of all that is old
Seize the moment, carpe diem.
Illegitimi non carborundum

Sunday, January 16, 2011

Red Bean Chili

Saving the meat in the freezer! I had a little bison meat, a little pork tenderloin, and sausage. It was all getting very close to coming down with freezer burn, and it needed to be used. Lots of beans and tomatoes were in the cabinet.. Not throwing away food, making food for the week in bulk for a healthy week of meals, all a combination of new solstice goals came together into one fabulous chili.

Shopping List:
  • Left over meats in the freezer (Some chopped bison meat, pork tenderloin, 3 sausages with the skins removed)
  • 1 medium onion
  • 10 cloves of garlic
  • 4 Serrano peppers, diced with the seeds in (WASH HANDS AFTER HANDLING)
  • OPTIONAL: 1 diced Habanero pepper **SPICY**(WASH HANDS AFTER HANDLING)
  • 2 14.5oz cans of diced tomatoes
  • 1 large can of whole tomatoes
  • 1 can of light red kidney beans
  • 1 can of pinto beans
  • 1 can of canned corn
  • 2 bay leaves
  • 1.5 tablespoons of cumin
  • 1 tablespoons of chili powder
  • 1 tablespoon of cayenne pepper
  • 2 tablespoons of parsley
  • 3 teaspoons of fresh cracked pepper
  • 2 teaspoons of salt

Putting it Together:
  1. Defrost the meat. All the meat except the pork tenderloin was ground up, I finely chopped the defrosted pork tenderloin with a large butchering knife to achieve a ground meat consistency.
  2. Heat up a big pot with a few tablespoons of olive oil.
  3. Add the chopped onion and meat, to brown the meat.
  4. Add 10 cloves of garlic, pressed.
  5. Strain the beans and corn, add the strained beans and corn
  6. Add tomatoes, cut the whole tomatoes in the pot with a scissor to have very coarsely chopped tomatoes. (this is fun!)
  7. Add 2 bay leaves, cumin, chili powder, cayenne powder, black pepper, and salt.
  8. Put on the cover and simmer for hours and hours.
  9. Taste test along the way. It is really important to taste it and see what you think it needs. If it's not spicy enough dump in a few more dashes of chili powder, if it is a bit bland, add flavor with cumin. AND, Remember, salt can help bring out all the flavors in the chili.
  10. Serve, top with sour cream, and cheese.
Notes:
- Cornbread is an amazing addition, but tortillas and chips are also a great accompaniment.
- Chili is hard to screw up, but without taste testing it will be hard to make it to your liking!
- If you don't have random meat in the fridge, ground turkey, ground beef, sausage, or any other meat are great options... Also, a bean chili could be made by adding 2 more cans of whatever beans you like, black, navy, kidney..
- See below for removing sausage from casings:

1.Slice a slit down one side with a pair of good kitchen scissors.
2. Peel back the casings and throw away.

Saturday, January 8, 2011

Chili Salmon and Corn Salsa

I was on the bus back from work and I get a text message "do you want Salmon?". It was funny, fish was not something we had since summer. It sounded like a great idea! Dave had found a recipe with the idea of salmon, roasted zucchini, and corn salsa.

It turned out to be one of those funny things where had some varying ingredients and ideas of what this meal should actually be. Following recipes is a great way to get ideas and to get started. I like how they give you hints of how to prepare the food with cooking times and temperatures too. The recipe is how we got started and it isn't how we finished. It was a great success. I call these types of recipes experiments, but they are more pulling from past meals and the ingredients in the fridge to make a new delightful meal.

Salmon and Zucchini Shopping List:
  • 2 salmon fillets (half a pound each)
  • 1 zucchini quartered
  • Chili powder
  • S&P

Putting it together - Salmon and Zucchini:

  1. Preheat the oven to broil on high.
  2. Take the two salmon fillets and zucchini and salt and pepper them.
  3. Rub the salmon with chili powder.
  4. On the highest rack slide in the salmon and zucchini and cook for 8-10 minutes (mine was closer to 10).

Corn Salsa Shopping List:
  • Half an onion
  • Half a red pepper
  • Half a tomato
  • Half a bag of frozen corn
  • 1 clove of garlic pressed
  • Fresh parsley - 2 tablespoons roughly chopped
  • Fresh spinach
  • S&P
  • Red pepper flakes

Putting it together - Corn Salsa:
  1. Dice the onion, red pepper, and tomato.
  2. Coat a frying pan with a light oil, heat up for 30 seconds and add the diced onion, red pepper, and 2 dashes of red pepper flakes
  3. After a minute to a minute and a half add the tomato, fresh parsley, pressed garlic, and S&P. Let cook for another minute.
  4. Add the frozen corn, stir it around and sizzle for a minute.
  5. Add the spinach  so it is sitting high above the food. It cooks down significantly. The amount you add depends on how much you'd like to eat.
  6. Take it off the heat after the spinach begins to wilt with a cover ON. The most important part of the corn salsa is to let the onion and red pepper to remain a bit crunchy. So the corn and spinach will cook in the remaining heat.

Notes:
It took the same amount of time for the corn salsa and salmon to cook (after minimal prep time).

Make sure to taste the corn salsa as you go- adding all the spinach will require a little extra salt.

If you don't like the amount of onion, be sure to adjust it to your taste, also, try scallions for a more mild flavor.

You can add the tomato cold and not cook it for a fresher texture and flavor.

Tuesday, January 4, 2011

Hummus

I got the idea in my head that I am going to be very healthy for the new solstice, in mind, spirit, and body. A hummus wrap sounded okay... but a homemade hummus wrap where I was in control of those garbanzo beans sounded pretty good. I made hummus once before by roasting my own peppers. It was good but I wasn't crazy about the combination, it got some rave reviews from taste testers, but being my own critic or maybe just a skeptic of garbanzo beans... yuck.

I opened my New York Times cookbook for a simple basic recipe which received serious modifications. It called for scallions, all I had was onion and it gave the hummus a real bite. It called for 3/4 cup of lemon juice, all I had was one lemon. Since the onion was more potent than the scallions would have been the reduced lemon juice turned out to be key to a solid hummus. In the spirit of my previous attempt at hummus I took the remaining store bought roasted red pepper and sliced it up and added it to the blender. I did not know if I would like it or even taste it. Next time I will add a little more roasted red pepper, it added a subtle flavor that sweetened up the batch.

This hummus turned out to be real experiment, and successful one. You should try!

Shopping List:
  • 2 cups of garbanzo beans
  • 2/3 cup of tahini (sesame paste)
  • 1/3 cup of fresh chopped parsley
  • 1/4 cup of finely chopped onion
  • 1 chopped roasted red pepper
  • 1 lemon
  • 2 cloves of garlic - pressed
  • 1 tsp of salt

Putting it together:
  1. Add all ingredients except for the parsley into a food processor.
  2. Hit the button and watch the garbanzo beans combine. If they aren't blending well slowly add a little bit of water. I like my hummus to be thick and chunky. By adding water you will make it smoother and creamier. ( Do not add more than 3/4 a cup)
  3. Stir in the parsley and crack the freshly ground pepper to taste.
  4. Eat!
    Notes:

    - You can add anything you like in hummus to the hummus. I liked the roasted red pepper and parsley, but if you aren't a fan you could add other combinations that you know you like in a dip. The key is adding these new ingredients in small amounts.
     - The onion is a bold flavor, try replacing them with scallions if you don't like that onion zing or if you want to try something new.

    Saturday, January 1, 2011

    Chicken Soup for the Food Poisoned's Soul

    After a wonderful meal with close friends in Boston, delicious appetizers and rich creamy meals of Spanish inspiration Dave got really really sick. I desperately wanted to make some chicken fricassee but I wasn't equipped with time or all the tools.

    Rachel had cleverly stored some matzo ball soup broth. The work was already done!

    Meal #1 : Rachel's Matzo ball soup with all the yummy matzo balls consumed

    She saved the left overs.

    Meal #2 : Chicken Frick

    I bought the smallest onion I've ever seen, the size of a golf ball, I chopped it up and lightly sauteed the onion. As it started to turn clear I added 4 large chicken drumsticks and added them to the pan. As the skins started to brown up I added a partially defrosted frozen matzo ball soup broth so the onions sizzled. I popped the cover on and let the fricassee/soup boil. I had little time to make it so I let it boil at full boil for about 30 minutes.

    Next I took all the chicken off the bone and packed it up. We drove home to good old CT for some R&R, on the way home I picked up 6 more boneless skinless chicken pieces. When I got home I added  can of chicken broth and the chicken, let that cook up at a light simmer for about 45 minutes. Presto! Meal #2.

    Saved the left over chicken.

    Meal #3 : Chicken Soup

    On that same trip home I picked up a pack of pre-chopped veggies. It had snow peas, onions, bell peppers, mushrooms, and broccoli. Tonight I lightly sauteed them in a big pot, added a combination of a tiny bit of bouillon, water, and chicken stock. Next, I added the left over chicken.

    On the side cooked some rice 1/2 way. When it was half way cooked I added it to the pot to finish cooking. This way it absorbs the flavor and is more yummy.

    Cracked fresh pepper, added about a 1/2 a teaspoon of salt because it was chicken-y enough but not salty enough and I didn't want to add bouillon.

    With a little fresh bread for the dipping, it was a delightful treat.

    Saved the left overs.

    Meal #4 : Chicken Stew-oup

    Left overs!

    Note: I am really into the saving and freezing- new meals that last a long time are part of my "healthy" new year's/ solstice projection.