Monday, February 28, 2011

Roasted Chicken and Sweet Mashed Potatoes

I had not cooked a chicken in a few long time. I got the urge to have my classic rosemary chicken and bought two chickens to cook.. since I am a Costco shopper. I admit, I did initially under cook the chicken because I was afraid of drying it out. Lesson learned. Here is how you cook the chicken without under cooking!

Shopping List:


  • 1 whole chicken
  • 1 tablespoon of cracked rosemary
  • 1/2 teaspoon of salt
  • 1/4 teaspoon of pepper
  • 1 capful of oil
  • 2 sweet potatoes (yams)
  • 1/2 teaspoon of salt
  • 1/4 cup of milk
  • 1/4 cup of reserved cooking liquid.
  • 2 tablespoons of light whipped butter

Rosemary Chicken:

  1. Clean out the insides and discard, we don't need gravy for this recipe.
  2. Clean the chicken by quickly running it under cold water and rubbing dry with paper towels.
  3. Apply cap of light oil over the chicken
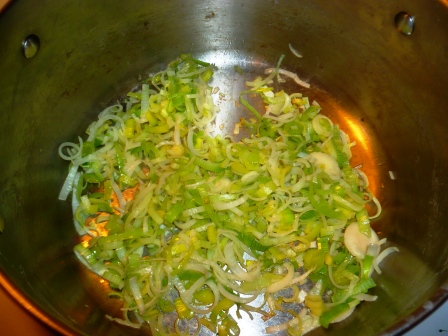
  4. Combine spices into a small dish so you do not contaminate the bottles and shakers
  5. Rub the rosemary concoction all over the bird inside and out.
  6. Let sit in the fridge for an additional 30 minutes if you can afford the time.
  7. Heat the oven to 350 and add with foil on top.
  8. After 1 hr and 15 minutes remove the foil and let bake longer. I'd say a good half an hour longer. (picture of when I took off the foil for rest of cooking)
  9. The key is, you want the legs to move freely and when poked with  a fork at the meatiest part the juices run clear.
  10. Upon carving, if you notice the juices are pink, put the sucker back in for another 10-15 minutes with a watchful eye. (I don't have a good picture of the final cooked bird because I butchered it and then realized I needed to put it back in.) I will add a picture the next time I cook one.)

Sweet Mashed Potatoes:

  1. Peel and dice the sweet potatoes
  2. Add to salted boiling water until fork tender, about 15-20 minutes.
  3. Strain potatoes reserving about 1/4 cup of cooking liquid.
  4. Add 1/4 cup of heated milk and 2 tablespoons of butter, 1/2 teaspoon of salt.
  5. Mash! Taste, adjust, Eat!

Notes:
- I love Savory's cracked rosemary, it is light and dusty without losing the rosemary texture and flavor. If you have regular rosemary I would recommend crushing it a bit so you don't get those long hard sticks of rosemary
-A lemon is a great addition to the chicken, but I don't love lemon over everything so I don't add it often.

Sunday, February 20, 2011

Keenie Kitchen Navigation Improved

I wanted to let all readers know, Keenie Kitchen now has a recipe index. Makes searching for meals and recipes easier! This new page can be found under the Navigation Aid on the top right side of the screen. I hope you enjoy this added feature.

Saturday, February 19, 2011

Sausage Fennel Onion and Peppers

I found this recipe years ago and have been modifying it ever since. After volunteering to cook for our girls art night, selfishly so I could make this blog post, I racked my brain for recipes new to this blog and new to all my friends.

Shopping List:
  • 3 sausages ( one mild and two hot) about 1lb
  • 2 fresh fennel
  • 1 medium onion
  • 3 peppers (2 red, 1 orange)
  • 1 can of whole tomatoes
  • 1 15oz can of diced tomatoes
  • 1 tblspn of tomato paste
  • 1 tsp of crushed red pepper
  • S&P
  • Parsley
  • Garlic powder
 Putting it Together:
  1. Cut the sausage out of their casings and separate.
  2. Add to a hot skillet and add 1/2 teaspoon of crushed red pepper and regular ground pepper (about 1/4 tsp)
  3. On a mild heat brown the sausage
  4. Once brown, transfer the sausage to a plate and allow oil to drain onto paper towels.
  5. With the remaining fat from the sausage turn the heat up to medium and add all the thinly sliced fennel.
  6. Caramelize the fennel (see picture below)
  7. Add the onions
  8. Add the peppers and sausage
  9. Add the whole tomatoes, diced tomatoes. Cut the whole tomatoes with a pair of scissors... this part is so fun.
  10. Add tomatoes paste, about a tablespoon of parsley, garlic powder, and S&P to taste.

Notes:
- When I add parsley and garlic powder to taste, I usually sprinkle a thin layer of spice over the whole pot, let it sit and then add another as I know/think is necessary. I have been trying to measure these "layers" out for my audience, but haven't been able to do that yet... Hold tight!
- Fennel is a difficult ingredient, I do not like how it tastes like liquorish, if you take a lot of care to caramelize the fennel it takes on beautiful sweet aromas and you no longer have the classic anise-liquorish flavors that overwhlem the dish.

Wednesday, February 16, 2011

Broccoli Soup with a side of Garlic Shrimp and Couscous

I was absolutely loving my healthy eating.. and I was so inspired by the recipe on Bon Appetit earlier I searched for some more healthy meals. I came across a broccoli soup with no cheese. This sounded genius to me. My mouth watered at my desk imagining what creamy delightful stew I was going to be throwing through my food processor.

Later, I thought about what the soup was asking for: broccoli, broth, leeks. Dave isn't going to be satiated! What to do? I blindly went to the store and tapped my brain for food that would compliment this creation. I pulled pearl couscous off the shelf and went home and marinated some frozen shrimp in the fridge for an hour with a little oil, garlic powder, S&P. Sauteed it with butter and wha-la. The couscous was garlic flavored and the shrimp, well, I could have eaten about 20 more.


Now for the soup:

Shopping List:
  • 1.25 pounds of broccoli (about 4 stalks)
  • 3 leeks
  • 4 cups of water
  • 1 tblspn of bouillon
  • S&P
Putting it Together:
  1. Peel the stalks and chop up your broccoli
  2. In a big pot saute your thinly sliced leeks in a light amount of olive oil, until right before they turn brown. Remove and reserve.
  3. Add the broth, broccoli, and S&P.
  4. Cook for 8 minutes until fork tender
  5. Blend.
  6. Add back to the pot, add the reserved leeks, shave a little Parmesan on top.
  7. Feast!

Notes:
- This wasn't AS exciting as I hoped, but the light parm on top added a nice flavor and it was a healthy yummy  packed bite of soup.
- I was hoping the broccoli would be more in tact, it was VERY pureed. Next time I more finely chop the broccoli (chopping broccoli, chopping broccoli!) and pulse it only 2-3 times.
- The left overs were surprisingly useful as a base for a pasta dish. I was feeling lazy, and I admit, cranky. I did not want to cook. My pajamas put me in a better mood. I used what was around the house to make a pasta thing, it was onion, frozen corn, frozen peas, pasta, some left over olives, chickpeas, sriracha, and the broccoli soup!! The broccoli soup acted like a light pesto that kicked this meal from boring to super. Talk about a mood changer.
- Link to original broccoli soup recipe.

Tuesday, February 15, 2011

Mediterranean Chickpea Pasta with Charred Tomatoes and Broccoli

The Keenie Kitchen is back from Jamaica! After a long weekend of too many Red Stripes and delicious bacon wrapped plantains, a few festivals (some sort of amazing deep fried biscuits).. it was time to kick up that healthy diet I have been PRETTY good about sticking to.

Searching for something new, easy, quick, I was also feeling vegetarian.. I looked up a few recipes. I found a charred tomato and chickpea pasta recipe which I will give you the link to in my notes. I liked the idea of having some bright red tomatoes on all hearts day.. I thought it sounded delicious but I knew my taste buds craved some modifications. Without further adieu:

Shopping List:
  • Pasta - 1/2 cup of reserved cooking liquid
  • 1/2 cup of store bought hummus (unless you have your own plain hummus that is awesome)
  • 1 package of cherry or grape tomatoes
  • 2 heads of broccoli
  • 1/2 cup of chopped black olives
  • 15 oz. can of chickpeas
  • 3 cloves of freshly pressed or minced garlic
  • 1 teaspoon of paprika
  • cayenne pepper
  • S&P

Putting it Together:
  1. Cook the pasta until al dente and reserve 1/2 cup of cooking liquid
  2. Whisk together the hummus and cooking liquid, it will be thin but creamy
  3. In a hot skillet covered with about 1 tablespoon of olive oil, add you tomatoes, sprinkle with fresh cracked pepper and sea salt. They will start to sizzle.
  4. After a few minutes add your broccoli, mix it around a bit until the broccoli turns a bright green. Then make the tomatoes stay more in the center (cook for another 5 minutes) until the tomatoes start to get a little brown on the bottom.
  5. Next add your black olives, garlic, chickpeas and paprika, mix it around so it heats up, but so it doesn't overcook at get mushy. (about 2-3 minutes).
  6. Smash up some of the tomatoes to release their juicy wonderful insides and add a sweet richness to all the ingredients in the pan.
  7. Finally add your pasta and then pour the hummus mixture over the skillet and combine.
  8. Taste it.. do you think it needs a kick? Add cayenne pepper! Do you think it is just right? Do not add cayenne pepper. I added just a dash and it added a little something but wasn't spicy.
Notes
- This recipe is a modification from: Bon Appetit
- I love this  recipe because it replaces peanut butter and/or cream depending on how you think about it, but you are left with a creamy delicious meal.


Tuesday, February 8, 2011

Chili Mexican Lasagna Pie

What to do with leftovers? We are headed to Jamaica! WOO! We just had a Superbowl party with tons of chili, wings, veggies, and awesome dip from our favorite store. I don't want the food to go bad, I know the chili is one of the main things left in my fridge, chili and spinach.

I am slumped in my slightly reclined seat on the bus, luckily no one is sitting to my right and I can stretch out my legs and relax. As I was zoning out from my day I started thinking about dinner, dreaming if you will.. right before I passed out I thought about how much fun it would be to make a chili lasagna. I knew we had the noodles and the dressings of the chili (sour cream, cheese, jalapenos, scallions...) YuummmmZzzzZzzzz.

Water is boiling, about to drop in my noodles when I hear a little voice, "we should use the tortillas.."

Dave had a genius idea, it was a similar dish that Scott used to make when we lived in Amherst, so here we go: (measurements are not really applicable here....)

Shopping List/Leftovers List:
  • Leftover chili
  • 2-3 spoonfuls of sour cream
  • 1 minced jalapeno
  • 5 small chopped scallions
  • Mexican cheese
  • spinach
  • tortillas

Putting it together:
  1. Heat the oven to 350
  2. Put a little chili on the bottom of your pot/dish/cake pan
  3. Put down a tortilla
  4. Put a couple handfuls of cheese down and sprinkle the jalapeno on top (spicy!)
  5. Layer a tortilla
  6. Put down a nice thick layer of chili, (don't be shy)
  7. Layer a tortilla
  8. Put down a few spoonfuls of sour cream, spread it across the tortilla so it is nice and thick, but not overwhelming
  9. In the same layer, add a few handfuls of fresh baby spinach, or chopped spinach
  10. Layer another tortilla, your last tortilla!
  11. Finally, layer a few more handfuls of cheese and the scallions, a few turns of cracked pepper and shove that in the oven! (not too hard)
  12. Cook for about 15-20 minutes.. probably closer to 20.

Notes:
- I think you can go in a million different ways. More spice, less spice, lots of cheese, a little bit. I didn't glob on the cheese, just enough to be gooey and yum in the tum
- I totally undercooked it, Dave put his in the microwave. I think maybe you could heat up the chili first, then cook it, or cook it longer.
- I also want to put corn in next time, I think that is what Scott used to do...

Monday, February 7, 2011

Buffalo Wing Sauce

The Super Bowl is a fun day to get together with friends and crowd around a TV with friends.. chowing down on chili, appetizers, wings, chips, and whatever other food deemed traditional for such an event.


I got very excited knowing that I had a fun day to cook these fun foods. Dave and I got up early and arrived at Costco as the doors opened. Disappointed free samples weren't abundant, we got down to business and bought a ten pound bag of frozen wings, other necessities, and headed home to start marinading the wings, slow cooking the chili, and begin our football day food prep!


Dave took over most of the cooking, we had our chili down cold from some great Sunday dinner chili nights. With my ringing headache, a result from skiing head first into the mountain the day before, I was happy Dave was chopping up all the ingredients with such intensity. My responsibilities were few, until it came to the second marinade for the wings. We used his classic teriyaki for one batch, the other was a crazy buffalo sauce that was cholula, beer, ketchup, and worchestire? WOAHHHH.. if it doesn't taste good in the bowl, start over!


I looked up a few recipes for Buffalo wing sauce online and ended up using what I had, and what sounded good to me. We only had 1 cup of cholula left, so Dave picked up some Frank's hot sauce which created a great flavor combination. This is how it went:

Shopping List:
  • Super Bowl XLV logo20 wings
  • 1 cup of cholula
  • 1 cup of Frank's
  • 2 sticks of butter
  • 1 onion chopped
  • 2 cloves of garlic minced or pressed
  • 1 jalapeno with the seeds in, minced
Putting it together:
  1. Melt the butter and combine all the ingredients. Mix it around so the wings have a healthy coat of sauce.
  2. Let it marinade for at least an hour.
  3. Heat up the grill to a low/medium heat
  4. Once preheated add the wings and cook for 12 minutes on one side
  5. Flip, baste, cook for another 12 minutes
  6. Baste, flip, cook for 1 minute
  7. EAT!
Notes:
- You can do a lot of spice adding or removing depending on your taste buds, this was spicy, but not too hot.
- If the wings are frozen you may add a few minutes to the cooking time.
- We let the wings marinate for 3.5- 4 hours.

Tuesday, February 1, 2011

Thoughts on Cayenne Pepper

This is not a traditional recipe post. I have just been really into cayenne pepper for the past week or so and wanted to share! Cayenne pepper is very strong stuff, it ranges from 30,000 to 50,000 scoville units, but when used in very small doses it packs a lot of flavor into a very small bite.
Like I mentioned in past blogs, my vegetable intake has been way up. Usually my focus is on recipes centering protein but I am looking for ways to add flavor and excitement to the vegetables to make them the centerpiece and not a side. So far in the Keenie Kitchen, the marvelous jar of cayenne pepper has been that needed extra sumtin, sumtin, (something, something). For those with taste buds that can't handle the spice, even a small dash will add that great flavor without sending you out for a gallon of milk to wash away the spice burning your mouth. This post is so appropriate with our local temperatures at -6 below! I am mentally trying to heat it up!
I have done a little research that adds great reasons to why cayenne pepper is at the front of my spice cabinet and had to share some highlights, maybe make you a believer too (if you aren't already).

Medical Benefits, Really? :

American Illustrated Medical Dictionary, the Merck Manual and Materia Medica, have labeled Cayenne Pepper to be a rubefacient, local stimulant, counter-irritant, gastric stimulant, and diaphoretic. Mexican Indians today use Capsicum as an intestinal disinfectant and protectant against contaminated food, and to treat fevers.

Nutrition:


What's the History? : (not in my own words... but still oh so interesting)

Capsicum also known as cayenne pepper has been known to the natives of the tropical Americas for thousands of years. It was first introduced to Europe by Christopher Columbus as Guinea Pepper and was originally used by Native Americans that were located south of the Mexican border as early as 700 B.C. The mixture of chocolate and red chilies was a taste treat that was reserved exclusively for Aztec royalty. Although the exact origin of the word Capsicum is somewhat a mystery, it is assumed to be derived from the Greek word kapto, which means to bite. Capsicum is a fruit found on a shrub-like tropical plant that is technically considered a berry. The designation of it as a pepper can be traced back to Columbus, who compared its hot taste sensation with that, a black pepper.

Gerard referred to Capsicum as extremely hot and dry in 1597 and prescribed it to those with skin and throat infections. The health practitioners of the 1800s used Capsicum to counteract rheumatism, arthritis, depression, and chills. Capsicum was used in the early 1800s as a potent and safe natural stimulant and was believed to be able to treat a large array of diseases. It was first used orally to treat tumors, toothaches, fevers, and respiratory conditions.
This cayenne red pepper was introduced to England by Dr. John Stevens in 1804 when it became the catalyst component in many herbal blends. Additionally, herbal and medical practitioners used Capsicum in order to fight infection and sustain the natural heat that the body produces. After, it became very well known in American dispensatories and pharmacopeia. In 1943, The Dispensary of the United States recorded Capsicum to be a powerful local stimulant that produces a sense of heat in the stomach and a general glow over the whole body when it is swallowed. It does all of this without having a narcotic effect.

Read more: http://www.articlesbase.com/health-articles/history-of-capsicum-cayenne-pepper-517487.html#ixzz1CjTBwuiK
Under Creative Commons License: Attribution

Facts from:
http://nutritiondata.self.com/facts/spices-and-herbs/201/2
http://www.articlesbase.com/health-articles/history-of-capsicum-cayenne-pepper-517487.html