Wednesday, August 17, 2011

Oreo Cheesecake Cupcakes (but Newman-O's instead)

I was innocently working one day, yes, I was working, when my co-worker pings me with a link to a blog like none I've seen before (click me). It was full of desserts, this was the first one I saw. A variation of Martha Stewart's Oreo cheesecake cupcakes. Instead of crushing all the Oreos and folding them in, one full Oreo was placed at the bottom with the cream cheese filling covering the top. Wow. Dangerous, daring, delicious... A few weeks later came the perfect excuse to make something I otherwise wouldn't have dared let enter my "dieting" kitchen. A surprise party for the best dessert chef I know, and fellow blogger (click me too).


My local grocery store doesn't carry the Oreo brand, instead we get Newman-O's (try them if you've never had them, AMAZING). With really the only variation to the recipe this is how it turned out....


Shopping List:
  • 42 Newman-O's (Crush 12)
  • 2 pounds cream cheese
  • 1 cup sugar
  • 1 teaspoon vanilla extract
  • 4 eggs
  • 1 cup sour cream
  • 1/4 teaspoon salt
Putting it Together:
  1. Coarsely chop 12 Oreos, I used the elusive Slap Chop. (Loved it!)
  2. Let the cream cheese set to room temperature, once at room temp., beat it until smooth. If you have a mixer use the paddle blade, if you do not have a mixer get that arm warmed up and mix it with a strong wooden spoon (like me).
  3. Once the cream cheese is smooth add the sugar, it will get a lot easier to mix (if mixing by hand) as you add the sugar.
  4. Next incorporate the vanilla.
  5. Add the eggs, two at a time and blend in completely.
  6. Blend in the sour cream and salt.
  7. Finally, fold in the crushed Newman-Os
  8. Preheat the oven to 275.
  9. Line your cupcake trays with the cupcake wrappers and place a Newman inside each one. I only had room for 24, but you can make up to 30.
  10. Scoop the filling on top, just about to the top, showing a little edge.
  11. Cook for about 20-25 minutes, you want them to just puff up a little bit.. they will not brown nor do you want them to.
  12. Remove from the oven, cool on racks, when completely cool store in tupperware in the fridge for 4 hours to overnight.
  13. Devour!!

Thursday, August 11, 2011

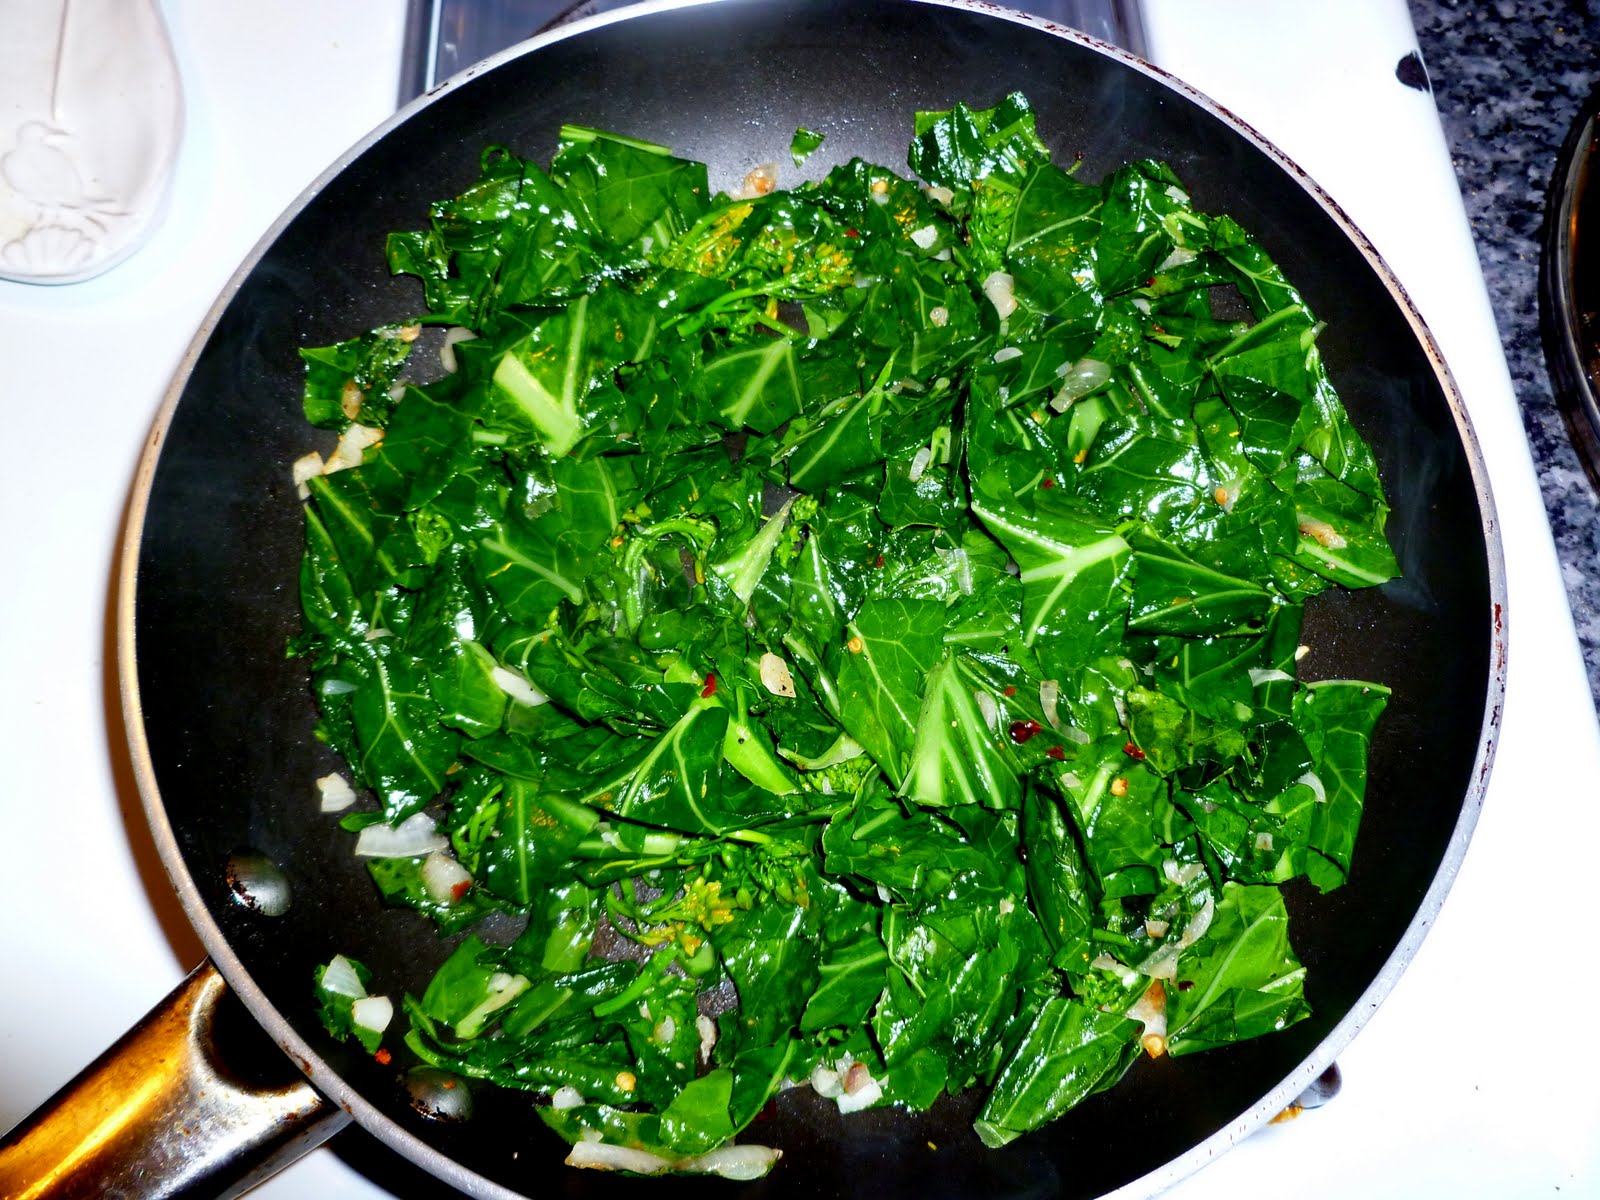
Sweet Soy Salmon and Spicy Collard Greens

I have been trying to eat healthy for a while now, and I keep recycling flavor combinations, but these ideas of mixing and matching creates endless opportunities for wonderful flavorful meals that don't leave you thinking you had it yesterday.  This night's dinner adds an Asian influence to a basic fish and greens dinner.

Some local farm fresh collard greens and some salmon probably imported from somewhere far away making the carbon footprint depressing high, yet delicious, are the major components for a Sunday night dinner or weeknight supper!

Shopping List:
  • Salmon - (I prefer the farm raised Salmon, sadly.. Ocean fresh salmon is too fishy for my palate.)
  • 1/4 cup soy sauce
  • 3 cloves of garlic
  • 1 larger bunch of scallions
  • fresh cracked pepper
  • One large bunch of collard greens
  • 1 tblspn of butter
  • 1-2 tsps of red pepper flakes
  • Salt
  • Fresh basil (if you can get thai basil all the better)
Putting it Together:
  1. Mince the garlic and scallions.
  2. Take a quarter of the garlic and a third of the scallions and combine with the soy.
  3. Salt and pepper the Salmon then add the soy marinade on top making sure to keep the good stuff on top of the fish. Let this marinate for 30-45 minutes.
  4. In the meantime (start some rice if that's what you want as your starch, and..) prepare the collard greens, cut off the hard ends and take the time to slice out the thick ribs. It is an extra step that is well worth the effort.
  5. Chop the greens into a size you are willing to eat.
  6. When you are ready to heat up the grill (to medium) you are ready to start the collard greens (collard greens take longer than other greens you may be used to cooking with).
  7. Heat your skillet to medium/ medium-high (7.5), and add the butter, as it is melting add the garlic and onions. Stir it around so it is a little sizzly.
  8. After about 60-75 seconds add the red pepper flakes.
  9. As the mixture turns a more clear color add the collard greens, incorporate the flavors at the bottom and cover. You want to make sure you cover it so the natural moisture recirculates and cooks the greens.
  10. Turn the stove top down to medium.
  11. You will occassionally stir the greens as they cook.
  12. Meanwhile gently plop the salmon on the heated grill and cover it up. Watch the salmon carefully, it will probably take 15-18 minutes depending on how big your piece is. Start checking at 10 minutes (unless you have small filets).
  13. Hopefully everything is done at about the same time, top the fish with fresh basil, plate and chow down!

Wednesday, August 10, 2011

Grilled Balsamic Portabellas

We had a trip to my favorite store and found the best looking pack of portabellas, they were so perfect I couldn't resist. Four fresh, firm, and fierce mushrooms landed in my cart. Two days later I was ready to fire up the grill and mix some of the fresh farmer's market CSA veggies mix and mingling on the hot grates. Dave was making a new recipe for goat cheese beets (not today guys.. but it will post eventually) and the Keenie Kitchen was in action.


Now before we got to the kitchen I was thinking about how to get these portabellas to be juicy and sweet. I was reflecting on how sour I have found balsamic vinegar lately, maybe Costco failed me and it was just cheap, maybe it started to go bad, but regardless I wasn't satisfied. What about balsamic dressing? That is typically sweeter and a little more delicious. At the market I picked up a nice bottle of balsamic dressing and went home to prepare for my feast.


Now I can begin...


Shopping List:

  • 1 Portabella per person
  • Balsamic dressing (one you like, or one that looks irresistible)
  • 1 red pepper ( half a pepper per person)
  • Fresh Mozzarella
  • Either a buns or fresh Italian bread
  • Fresh basil
Putting it Together:
  1. Turn the portabellas with the cap side down, fill the belly with a healthy dose of dressing and let marinate for about 20 minutes.
  2. Meanwhile cut the pepper in half and squish flat with your hand. (cut up any other veggies for grilling)
  3. Fire up the grill to medium hot.
  4. Put the portabellas on with the cap side still down, and throw (or place) the red peppers on along side.
  5. Grill both the peppers and mushies on each side for 5 minutes, when you flip the portabellas it will fire up the flames as the dressing is lost (a little less time if your caps are smaller).
  6. In the last minute, toast the bread on the grill.
  7. Bring all those wonderful veggies off the grill.
  8. Peel the chard skin off the red peppers
  9. Begin the assembly! Layer the mushroom, your freshly roasted red pepper, mozzarella, and a sprinkle with a little fresh basil.

Saturday, July 2, 2011

Lean Turkey Burgers

A funny problem I ran into this summer (well not just this summer, but it arose again), is the price of ground turkey meat in Boulder Colorado. It is about $7 a pound, seriously?? I really do not understand it. I was at the grocery store and dying to hone in on my grill skills and make some delicious turkey burgers. All they had was 99% lean on sale... Okay, that will be dry as the desert sand on a summer's day. I decided I was up for the challenge and modified my grocery list to make these dry patties a little more delicious than they otherwise would have been.


Shopping List:
  • One package of turkey meat
  • 1/4 onion chopped small
  • whipped butter
  • 1 egg
  • one big squirt of ketchup
  • one big squirt of dijon mustard
  • 2 tblspns of water
  • S&P
  • Homemade breadcrumbs, or store bought.
  • Mushrooms sliced
  • 1 tblspn of whipped butter
  • package of guacamole


Putting it Together:
  1. Heat a skillet on medium with a little whipped butter, as it starts to melt add the onion, cook until clear
  2. Meanwhile, in a bowl add the egg, ketchup, mustard, water, and S&P, whisk together.
  3. Add the turkey meat to the bowl of egg mixture.
  4. As the onion is ready add it to the turkey meat, you might not want all of the onion in there so think about how onion-y it looks and what you like.
  5. Once the onion is incorporated it is time to add the breadcrumbs. Because these are going to be dry you want to go as light as possible on the breadcrumbs. Add a little at a time until they barely will hold together.
  6. Heat the grill to medium.
  7. Cook the patties about 3.5 minutes on each side.
  8. Meanwhile, add mushrooms to a warmed skillet of butter, cook on medium until they start to shrink up.
  9. In the last two minutes add cheese on the burgers, pepper jack is the best, but a personal preference.
  10. In the last minute add buns to the grill.
  11. Take everything inside and chow down.


Wednesday, June 29, 2011

Camp Brunch - Eggs and Sausage

Out in the wild outdoors, but close enough for cellphone reception, Dave and I were in Buena Vista for my birthday weekend.  Seasoned chefs from the Moab trip two weeks prior,  great ideas were streaming through our heads. We carefully shopped for our ingredients before hand. With this vista (RIGHT) in sight, the following meal was whipped up to our delight.

What to bring:
  • 1 jalapeno
  • 1/4 onion
  • 2 sausages (we used apple & maple sausage)
  • 3 eggs
  • 2 tablespoons of whipped butter
  • S&P
  • Shredded Pepper Jack cheese
  • Tortillas
Putting it Together:

  1. Chop up the jalapeno, onion, and sausage in the pan you are going to cook in. (or use a cutting board or camping box top)
  2. Start up the camping grill with the pan on top, as the pan heats up (and it heats up quickly) add the butter.
  3. Cook on a medium/high heat. Mix it around like you are cooking a skillet at home.
  4. As the sausage starts to smell awesome, and the onion looks like it is carmelizing you are pretty much ready for the eggs.
  5. Crack the eggs on top of your sausage mixture.
  6. Scramble them in the pan.
  7. see my spatula start from the bottom and up.
  8. Cook until they are the desired wetness, i think it is good when they are still gooey and the egg sticks to everything, when you just stop seeing clear egg give it 30 more seconds and you are done.
  9. Add the cheese and combine so it is melted throughout.
  10. Serve in a tortilla!

Monday, June 20, 2011

Kale Pasta

Keenie is back in the kitchen, and just in time for the summer solstice.

Freshly stocked with amazing farm share food I had bountiful greens, but not some much in the way of "other" vegetables.  I picked up my feet and scooted over to the local grocer and picked a nice bunch of fresh carrots.  The carrots were so bright and vibrant they couldn't be passed over. 

These bright orange veggies added a delightful sweetness to the pasta dish and cannot be omitted. I had the luck of getting amazing garlic on a long stem, I was instructed it had to be chilled for preservation, like nothing I've had before, delicious! (But, it can be substituted for regular garlic, it's just not as sweet)

Enjoy! this bright summer pasta:

Shopping List:
  • 1 bunch of carrots julienned
  • 1 bunch of hardy kale with the hard stems removed
  • 2 minced cloves of garlic
  • 1 tablespoon of peanut oil
  • 1 tablespoon of butter
  • S&P
  • 1/4 - 1/2 tsp red pepper flakes
  • 1/4 - 1/3 box of pasta
  • 1/4 cup of freshly grated Parmesan cheese

Putting it Together:
  1. Prepare the vegetables, remove the hard stems of the kale by folding it in half and slicing out the spine. Julienne the carrots, mince the garlic.
  2. Start boiling water for the kale and pasta. Salt it.
  3. Add your peanut oil to a stir fry skillet and start to saute on a medium heat. Add S&P, red pepper flakes, and parsley is optional. As it starts to sizzle for a minute or two add the garlic, then after one minute add a splash of water and cover (check through out that carrots aren't getting dry and add a splash or two of water when necessary).
  4. After the carrots are going, the water should be boiling in a few minutes, when it is, add the kale. Make sure the kale gets covered and sinks into the water. Cook for 8-10 minutes, until the kale is tender but not soggy.
  5. Remove the kale from the water, keep the kale-water in the pot and on the heat.
  6. Add the pasta to the kale water and cook until Al dente
  7. Meanwhile strain the kale and roughly chop, then add the kale and butter to the carrots and let it cook on a medium heat until the pasta finishes (about 6 minutes). Make sure you incorporate all the ingredients so they all develop the flavor.
  8. Add the cooked pasta.
  9. Add the cheese RIGHT before serving.
  10. Chow down!

Wednesday, June 15, 2011

Isabelle Farm Share

Its been a long time! Summer solstice is nearing, as I renew my solstice projections, I return to my blogging of Keenie Kitchen cooking.. I have made some delicious things that I have not shared.. some old ones are going to come, some new ones are promised.

Please stay tune as tonight I receive my farm for the second week this season from Isabelle Farms (click me)... Full of fresh, amazing, and organic vegetables. The first week was full of beautiful greens, radishes, and turnips.. this week promises a little broccoli rabe.